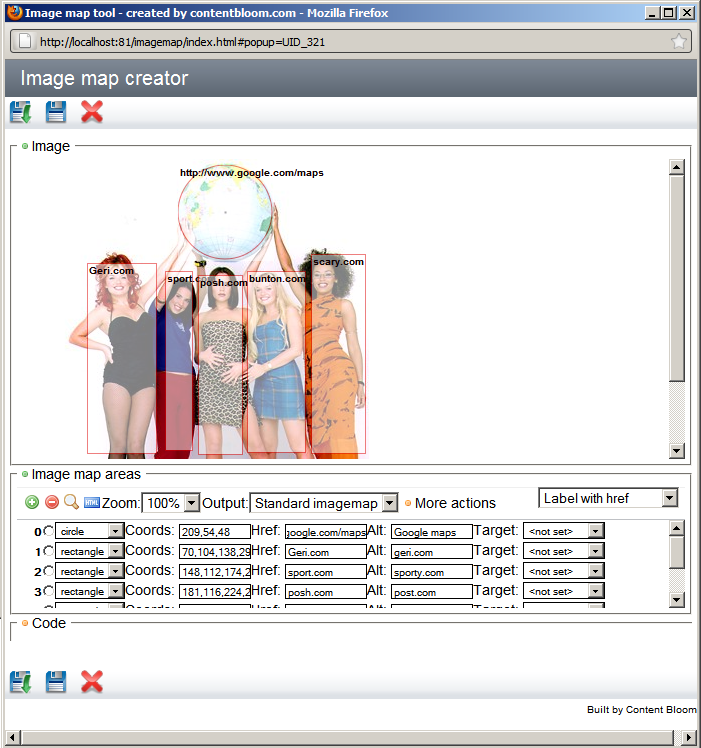
Now you’ve got the Image Map extension installed, you’re now to ready to dive in and create loads of image maps 
1) Create a new image component using the ‘image map’ multimedia schema
2) Upload your image file, then select the metadata tab
3) Click the text link to open up the image map tool
4) The image map tool will open in a new window…Now the magic happens!
5) The tool allows you to click and create rectangles, circles and poly shapes. Note: the trick is to click release and move the mouse, not to click and drag (as some browers will try and move the image).
6) The image shapes are then created over the top of the image, allowing you to specify linking and alt tag information in the available fields. It doesn’t allow you to select components… that would be a cool addition to the tool!
8) When you’re finided click to save and close or save (found at the top and bottom of the window) which will update the metadata information of the multimedia component.
9) Now save your multimedia component and you’re done….
10)Â Well not quite, you will still need to ensure that when you render your image with your template, you also print out the image map code and link it up to the image.


Pingback: Installing the Image Map extension for SDL Tridion | Tridion Developer