Recently I was involved in the setup of a new content-delivery environment, migrating from a WebSphere 7.* application server to WebSphere 8.5.5. Right away when we started up the application, we started seeing some content-delivery errors with our session preview web-service which we did not experience on WebSphere 7. I’m going to review the problem, and talk about how it was resolved. Continue reading
Category Archives: Tridion news
Translation Manager – would it ever unlocalize something in my translation publication?
Oddly enough, yes it can – in a very specific scenario – of course, this can be avoided with clear processes (or even better automation) with the right hotfix (TT88491: Translation Manager revert retrieved translation for target item in “Reserved state”) but it’s good to know as tracking this down was a real bugger!
Razor Templating Tricks with LINQ
Often times when folks are stepping into the world of the Razor Mediator they do not fully understand what new capabilities are provided OOTB. Back in the days where DWT reigned supreme, more often than not, we had to write TBBs for simple logic such as grouping component presentations for rendering, etc. Continue reading
What I learned from building my first Alchemy plugin
I finally found some time to start working on my own plugin built in this incredible new framework developed by Content Bloom called Alchemy. You can see my plugin on the Alchemy Webstore here. It’s called Not Used and it’s really just a basic cleanup tool that allows a Tridion user to search for and remove various items that are not in use. Perhaps more interesting than the plugin itself is the process of learning to work within the Alchemy framework, which requires a combination of knowledge in Tridion’s Anguilla framework, C# core service API and standard .NET web technologies. Some of these have documentation that is seemingly hidden or otherwise very difficult to track down and/or decipher. Here I discuss some of the trickier bits of my experiences developing an Alchemy plugin, in hopes that these details will help others encountering the same challenges. Continue reading
Setting up your development Environment (.NET)
Welcome to my attempt to introduce you to Digital Experience Accelerator (DXA) in a 7 days posting marathon, explaining how DXA works, what are the ways to use it and how you can contribute.
But first of all, what is Digital Experience Accelerator or shorter named DXA?
DXA is an open source product build on top of the very popular framework DD4T (Dynamic Delivery 4 Tridion), available in Java (https://community.sdl.com/developers/tridion_developer/m/mediagallery/1241) and .NET (https://community.sdl.com/developers/tridion_developer/m/mediagallery/852).
DXA is intended to help you create, design and publish SDL Web (formerly known as Tridion) based websites, together with its out-of-the-box modules like Experience Manager, SmartTarget and Search.
In order to set-up the development environment for .NET, visit the community website to download the source files, https://community.sdl.com/developers/tridion_developer/m/mediagallery/852.
The following items are found in the zip file:
- Import package and scripts for the BluePrint
- HTML designs that are optional to use
- Code folders, used to connect to the SDL Core Services
- An available module for this version supported by SDL
- The src that we will be using for our project
- A prebuild web application of the src
- Web-ref- folders containing configurations for your live or staging website
- Information about the location of the documentation.
First step is to copy the content of the src folder into your code repository and make a clean initial commit. TIP; if you are using a Git repository, I strongly recommended to take a look at Git flows. More information about Git flows at the following link: http://blog.sourcetreeapp.com/2012/08/01/smart-branching-with-sourcetree-and-git-flow/
Second step is to create the .gitignore file. If you are not sure what to put in there, have a look at the one from DXA https://github.com/sdl/dxa-web-application-dotnet/blob/master/.gitignore
Last step is to copy and update the configuration files into our project. The files can be found in the web-ref-staging folder. Update the cd_storage_conf.xml with the staging databases that you are using.
All we have left to do is commit our code to the repository and we are ready to start our DXA development.
Now there are a few ways to develop and/or extend the default site project. One way is to add everything in the existing site project. Personally I’m not in favor of this method as it limits your flexibility and capability to develop in an agile way, not to mention adding additional complexity to any future upgrades that you plan. Instead of that, you might want to split up the components in projects, develop and deliver shippable products at every sprint.
Creating separate modules for functionality increases flexibility, re-usability and a cleaner, more transparent work environment. More about creating separate modules for functionality in the following blog posts. Meanwhile, let’s take a look at creating a site “module†as component.
The simplest way to do this is to use an (Open Source) Visual Studio Extension for DXA available at https://visualstudiogallery.msdn.microsoft.com/2e4c85a5-3f90-4f01-97e3-515cc99d9891.
It contains prefabricated project templates for a Site, Modules and other classes; handy for new developers to become familiar with DXA faster. During today’s post and in the next, we will be using it as a reference, helping to speed up things.
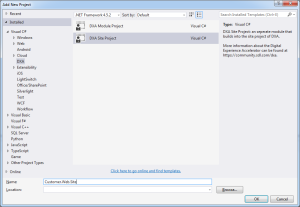
With the extension downloaded and installed, when adding a new project, the DXA option becomes visible below Visual C#, DXA. For our work today, select the Site Project.
The newly added site project has by default a folder structure with an Area for your views, Controllers and Models. It contains a disabled build event that can copy the Views, DLLs, etc. into the site project when removing the rem in the “Post-build event command line”.
At the moment of writing this post, the site project is missing two references namely, Sdl.Web.Common and Sdl.Web.Mvc. These references you can manually add yourself from the default site project.
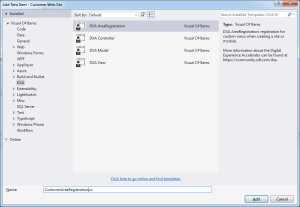
Now you can add an AreaRegistration class, this class is used by the web application to look up the strongly typed models and match them with a view. This can simple be done by adding a new item, as seen in the picture below.
I would recommend to rename the Areas/Site folder to Areas/Customer and update the Site in the CustomerAreaRegistration.cs to Customer too.
That’s it; you have setup your development environment and are ready to build your first DXA site with a clear separation of components. Hope to see you tomorrow for another DXA post.
Intro to the Event System
 An event, in any computer system, is an interruption in the current process. The computer is busy doing what it should be doing, and then something happens to stop it and send it in a different direction. In old systems this was limited to the user clicking a keyboard key or a mouse button. Now, with much more complex systems, it can include state changes, network events, new data, and nearly everything else. Continue reading
Tridion DXA – Blueprinting Options
Thinking of updating the default DXA blueprinting structure? I’ve outlined some of the common scenarios to help consider how to best structure your DXA implementation.
Alchemy Plugin: DXA Page Preview
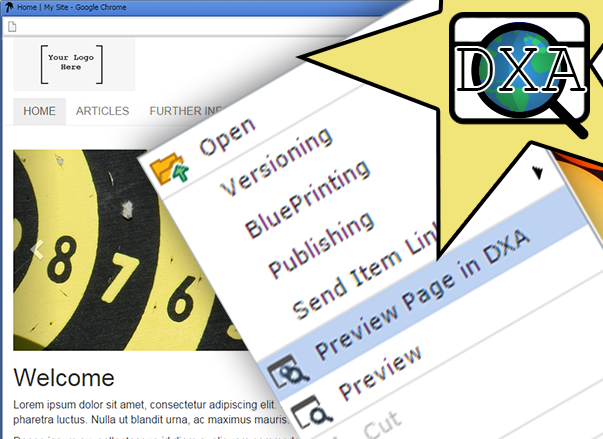
The Alchemy DXA Page Preview plugin allows you to preview a DXA page inside the CME without publishing the page to the content delivery server.
Automating Alchemy Plugin Uploads in Visual Studio
Anyone building a plugin for Alchemy4Tridion is familiar with the repeated steps of:  Building the project, alt-tabbing to the CME Alchemy page, uninstalling the plugin, alt tabbing to your build directory, moving your hand to the mouse, dragging the *.a4t to the plugin window, yaawwwwnnn, ctrl-tabbing to the CME Content Explorer, F5ing the content. After the billionth time of doing this you yearn for something quicker!
Alchemy plugin : Google Analytics reporting
Adding Google analytics to your website is fairly easy. You need a google analytics account, some javascript, add that to your website html, et voila, you can track your visitors.
Off course, someone needs to analyse this data, see how many visitors your site gets, see where they come from, …
Google provides a website where you can see all this, but it might not always be easy for users to work with that tool.
This Alchemy plugin allows you to see Google analytics data for your website, right from your Tridion CM GUI. It adds a Google Analytics dashboard in the publication dialog.

To get this working, you need to perform the following tasks
- Install the plugin from the Alchemy webstore
- Create a new Google API key (for this, you need a google account).
- Go to https://console.developers.google.com/, log in with your google account, and create a new project
- In the project, open the API page, find the Analytics API and enable it.
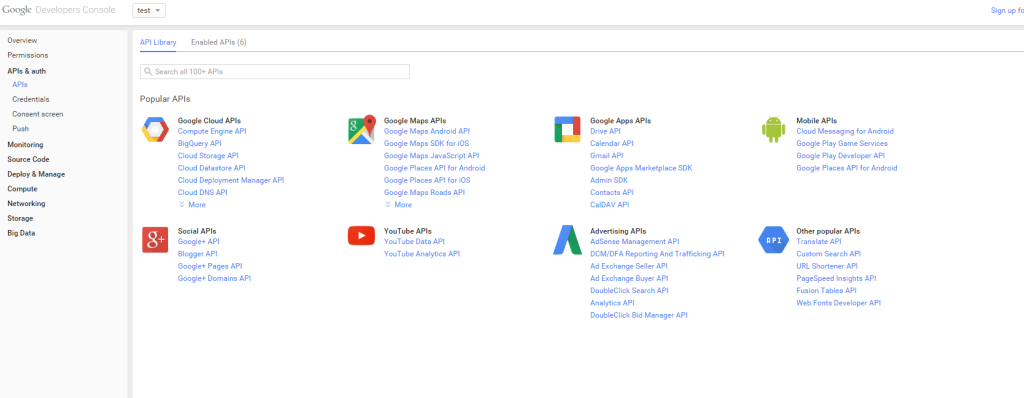
- Once it’s enabled, you should see a usage report for this API. As it’s only just created, you won’t see much here
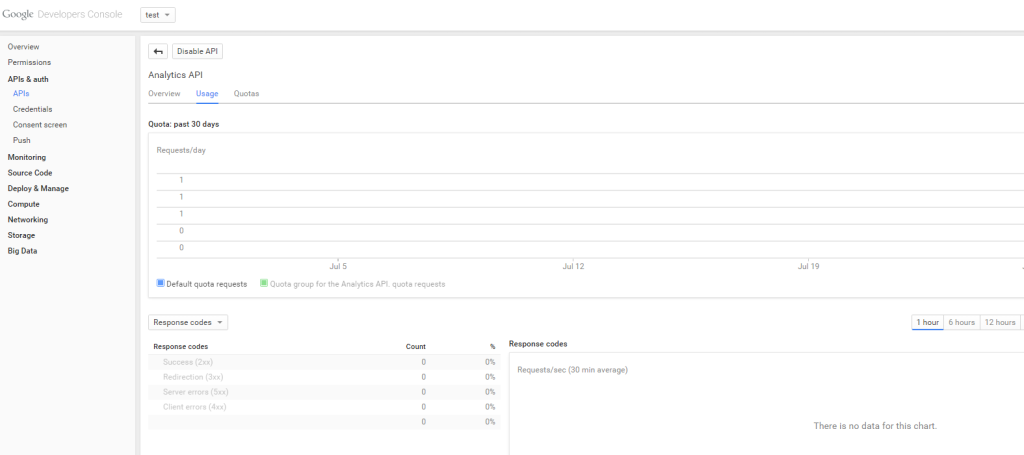
- Next, open the credentials window. Here, you need to create a new service credential, to let Tridion access your Analytics API account. To do this, click the ‘Create new client ID’ button. In the popup, choose a ‘service account’.

- When it’s created, you should see a new service account Client ID, email address etc.
 You will need the Email address and you should also click the ‘Generate new P12 key’ button. This will download a file to your local machine.
 - Now, open your google analytics dashboard, and add a new user. Here, you should add the email address you received with your new service account. The account only needs read rights.
- With this data, go back to your Tridion machine.
Create a new metadata schema with the following fields (you can also add these fields to an existing metadata schema). The metadata schema should be applied to a publication.- gaServiceAccount (text field)
- keyPath (text field)
- gaProfile (text field)
- Now, open a publication, and apply this metadata schema to it. You have to fill in the fields as follows :
- The service account field should contain the e-mail address you got earlier.
- The keyPath field should point to the p12 file you downloaded earlier. This file should be copied on your Tridion server. The field should contain the full path (c:\my-key-folder\my-service-key-file.p12).
- The gaProfile should contain your google analytics profile ID. You can get this by logging in to the google analytics site (where you added that service account email earlier), and get the profile ID from the url.

The number after the p in the url is your profile ID - Once you have this set up, save and close your publication, and reopen it.
When your alchemy plugin is active, you should see a new tab in your publication dialog “Google Analyticsâ€, and when opening it, you should see a number of graphs for your website usage
Tips :
If you have multiple publications for different websites, you could configure each publication separately to show analytics for one specific website.
Future improvements
Currently, the dashboard is only showing a couple of graphs. A next version should allow you to configure this dashboard, so you can select which data you want to show in the page.

